Using OBS Studio
OBS Studio is a free and open-source streaming and recording software. It's the most popular tool for live streaming interactive games from GEMTOK to TikTok, YouTube, Twitch, and other platforms.
This guide covers:
- Downloading & installing OBS Studio
- Setting up Window Capture for GEMTOK Classic Games & Mini Games
- Adding Browser Source for GEMTOK Stream Studio overlays
- Configuring stream settings for TikTok Live
Download & Install OBS Studio
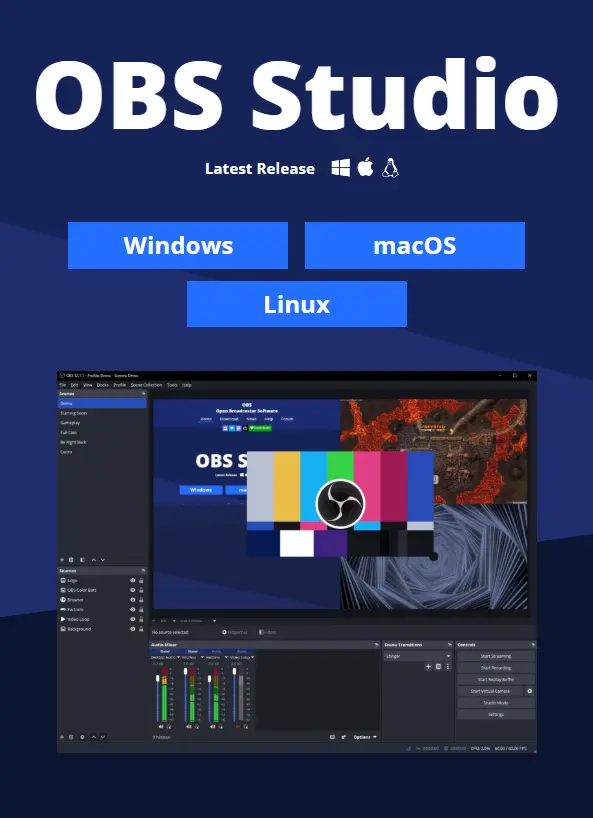
Run the Installer
Open the downloaded .exe file. The installer will guide you through:
- License Agreement — Accept.
- Installation Path — Leave as default or choose your preferred folder.
- Components — Keep all defaults (includes Auto-Configuration Wizard).
- Install — Click Install and wait for completion.
During installation, OBS may ask if you want to use the Auto-Configuration Wizard. You can run it now or skip and configure manually later.
First-Time Setup
When you launch OBS for the first time:
- The Auto-Configuration Wizard will appear. Select "Optimize for streaming, recording is secondary" and click Next.
- Choose your preferred resolution and FPS (1920x1080 at 30 FPS is a good starting point for TikTok).
- Enter your stream key (from TikTok Live Center or your platform of choice).
- Click Apply Settings.
OBS is now ready. Next, we'll add your GEMTOK sources.
Adding GEMTOK Games via Window Capture
GEMTOK Classic Games and Mini Games run in your browser (Chrome, Edge, etc.). Use Window Capture to capture the browser tab or window in OBS.
Launch Your GEMTOK Game
Open the GEMTOK dashboard in your browser and launch a Classic Game or Mini Game. The game will open in a new browser tab or window.
For best results, open the game in a separate browser window (not just a tab) — this makes it easier to select in OBS and avoids capturing your entire browser UI.
Add a Window Capture Source
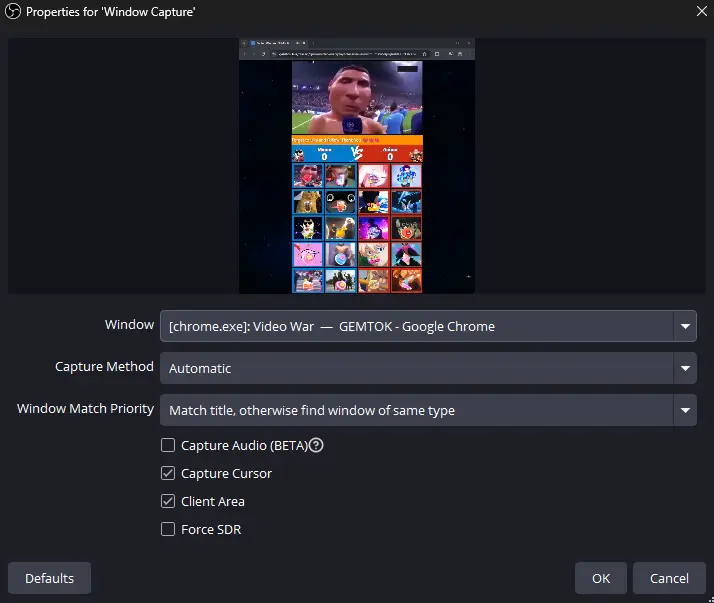
- In OBS, look at the Sources box (bottom section).
- Click the + button and select Window Capture.
- Name it something like
GEMTOK - Classic GameorGEMTOK - Mini Game. - In the Properties window:
- Window: Select your browser window (e.g.,
Chrome.exeormsedge.exe) from the dropdown. If you have multiple tabs, pick the one showing the game. - Capture Method: Leave as
Automatic(orWindows 10 (1903 and up)if available). - Capture Cursor: Uncheck unless you want the mouse visible.
- Window: Select your browser window (e.g.,
- Click OK.
Resize & Position
After adding the source, you can:
- Drag the red border in the preview to resize the game window.
- Hold Alt + Drag to crop edges if needed.
- Right-click the source → Transform → Fit to screen for a quick full-canvas fit.
If you're running both a Classic Game and a Mini Game simultaneously, add two separate Window Capture sources — one for each game window.
Adding Stream Studio Overlays via Browser Source
GEMTOK Stream Studio provides browser-based overlays (chat, event list, goal bars, leaderboards, etc.) that you add to OBS as Browser Source.
Open Stream Studio
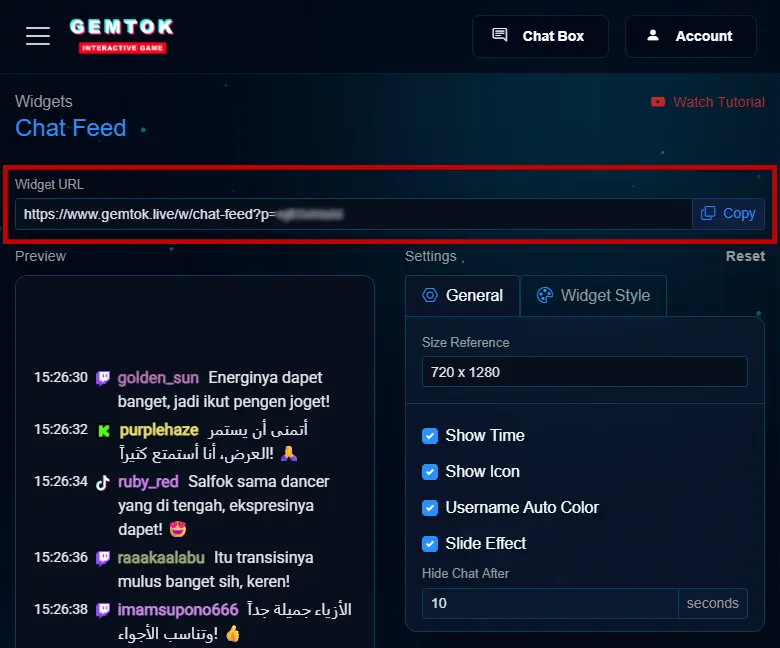
In the GEMTOK app, navigate to Stream Studio and open the Overlays section. You'll see a list of available overlays with their URLs.
Copy the Overlay URL
Each overlay has a unique URL. Click the Copy button next to the overlay you want to add (e.g., Chat Overlay, Event List, Goal Bar).
Overlay URLs are unique to your account. Do not share them publicly — anyone with the URL can view your stream overlay data.
Add a Browser Source in OBS
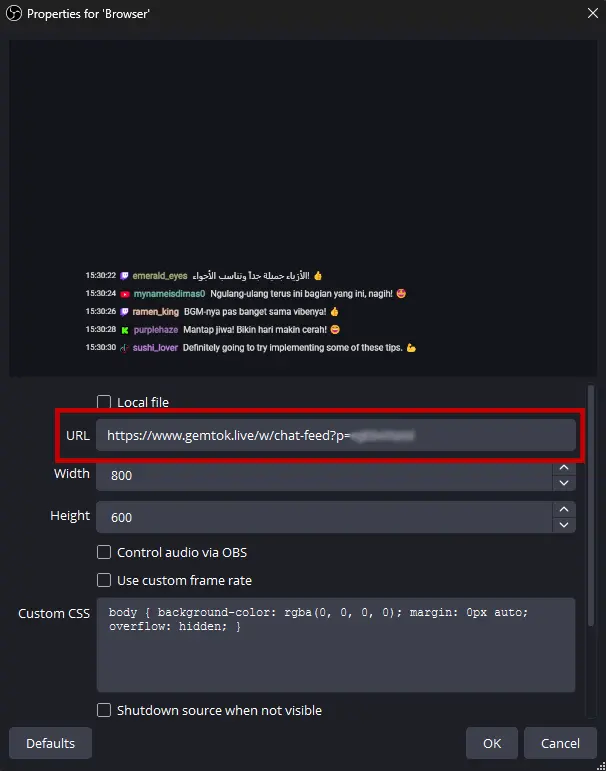
- In OBS, click the + button in the Sources box.
- Select Browser.
- Name it (e.g.,
GEMTOK - Chat Overlay). - In the Properties window:
- URL: Paste the overlay URL you copied.
- Width: Your canvas width.
- Height: Your canvas height.
- Custom CSS: Leave empty (unless you want custom styling).
- Refresh browser when scene becomes active: Check this if you want it to reload each time you switch to this scene.
- Click OK.
Position the Overlay
In the OBS preview, drag the overlay to the desired position. Common placements:
- Chat Overlay — Bottom-left or bottom-right corner.
- Event List — Bottom or side edge.
- Goal Bar — Top or bottom center.
- Leaderboard — Side panel.
Overlays often have transparent backgrounds — they will layer on top of your game capture automatically. Make sure the Browser Source is positioned above your game capture in the Sources list.
Add Multiple Overlays (Optional)
Repeat the steps above for each overlay you want. Common combinations:
- Chat Overlay + Event List + Goal Bar
- Chat Overlay + Leaderboard
- Sound Alert overlay (visual component)
Each overlay gets its own Browser Source entry in OBS.
Scene Organization Tips
Organizing your sources makes streaming smoother:
Scene: GEMTOK Stream
├── 📺 GEMTOK - Classic Game        (Window Capture)
│   └── 🎨 GEMTOK - Chat Overlay    (Browser Source)
│   └── 🎨 GEMTOK - Event List      (Browser Source)
│   └── 🎨 GEMTOK - Goal Bar        (Browser Source)
├── 🎤 Microphone                    (Audio Input Capture)
└── 🔊 Desktop Audio                 (Audio Output Capture)
Source order matters! Sources listed higher in the list appear on top in the preview. Keep overlays above game captures so they're visible.
Configuring Stream Settings for TikTok
Get Your Stream Key
- Go to TikTok Live Center → Go LIVE → Streaming Software.
- Copy your Stream URL and Stream Key.
Configure OBS
- In OBS, go to Settings → Stream.
- Service: Select
Custom.... - Server: Paste the Stream URL from TikTok.
- Stream Key: Paste your Stream Key.
- Click OK.
Recommended Output Settings
Go to Settings → Output:
| Setting | Recommendation |
|---|---|
| Video Bitrate | 2500 - 4000 Kbps |
| Encoder | Hardware (NVENC / AMF / QuickSync) |
| Audio Bitrate | 128 Kbps |
| Output Resolution | 1920x1080 or 1280x720 |
| FPS | 30 |
TikTok Live supports up to 1080p at 30 FPS. Higher bitrates may cause buffering for viewers on mobile data.
Start Streaming
Click Start Streaming in OBS. Your GEMTOK game with Stream Studio overlays is now live on TikTok!
Troubleshooting
| Problem | Solution |
|---|---|
| Window Capture shows black screen | Run OBS as Administrator (right-click → Run as administrator). Or try Capture Method: Windows 10 (1903 and up). |
| Browser Source not showing overlay | Check the URL is correct. Click Refresh (refresh icon) on the Browser Source in OBS. |
| Overlay appears behind game | Move the Browser Source above the Window Capture in the Sources list. |
| Audio not working | Check that Desktop Audio is enabled in OBS Audio Mixer. |
| Stream lag / dropped frames | Lower the bitrate to 2500 Kbps or reduce resolution to 720p. |
Next Steps
- Learn more about Stream Studio Overlays
- Explore Classic Games and Mini Games
- Set up Actions & Triggers for automation